Wednesday, October 13, 2010

Monday, October 4, 2010

Huntington Gardens - Koi Pond

A few weeks ago we took a day trip to the Huntington Gardens (in South Pasadena).  For me it was a sprawling adventure in gardens, art, and peaceful surroundings. I love the fact that as soon as I entered the gardens I never once felt like I was in the middle of one of the largest metropolitan areas in the world.
Over the next few weeks I will be playing around with some of the pictures I took, then posting them on this site. The gardens were amazing and left me with so many ideas.... Happy viewing!

Wednesday, September 22, 2010

All-in-one Postcard!

I received a post card in the mail last week! It is always a treat to get something that is not a bill or an advertisement or a necessary piece of correspondence, but this was particularly exciting because it contained all three elements of my blog title: Food, Art, and Flora!

Below is the postcard:


Now, I will admit, this is an odd sort of picture, yet perfect for me! In case you are not certain about the elements I have labeled below... Food in the form of chiles. Art in the form of painted mailboxes. Flora in the form of the wreath and paintings of plants on the mailboxes.

Dear friend, thank you for thinking of me and sending the postcard!

Wednesday, September 15, 2010

Art and Resistance.

I am reading a book right now called "The War of Art", by Steven Pressfield. It is about overcoming the blocks that prevent us from doing the creative work we feel called to do. The following section significantly altered the way I look at resistance, so I thought I would share it with you.

In some ways I think this is like breaking through a big brick wall. 

Resistance and Love

Resistance is directly proportional to love. If you're feeling massive Resistance, the good news is, it means there's tremendous love there too. If you didn't love the project that is terrifying you, you wouldn't feel anything. The opposite of love isn't hate; it's indifference.
The more Resistance you experience, the more important your unmanifested art/project/enterprise is to you - and the more gratification you will feel when you finally do it.

Monday, September 6, 2010

Where does the time go???

What happens to a blog when you work way too many hours? What happens when you are training for a marathon and the mileage has suddenly ramped up significantly? What happens when you get home from work and all you want to do is crawl into bed and sleep? What happens when you have a gazillion-mizmillion ideas you want to write about, but cannot seem to make the time to put anything to paper?

Nothing.

Absolutely nothing happens.

You look back and there are no entries. The photos you took three weeks ago are still waiting to be formatted for the web. The fizzmillion ideas you have are still floating in your head, bumping up against the other thoughts about work and cleaning the toilets and doing laundry and paying the bills and checking on your family and getting your oil changed and... You get the idea.

My commitment to you, wonderful reader, is to post something at least once a week. It will continue to involve food or art or flora, but it may be less about my exploration in those areas and more about some of these thoughts bumping around in my head.

I would appreciate any feedback (positive or constructive) on what you have enjoyed about these postings, if you have learned anything, and what you would like to see more of on here. In the same vein, if something just doesn't work for you, please let me know about that as well.

I have enjoyed writing these posts and watching this space evolve. I look forward to further posting and exploration and appreciate any and all feedback from you!

Thanks!

Saturday, August 28, 2010

My Favorite Tomato Sauce

Have you ever had one of those days when you get home from work and it's late. You still have to workout, so being the committed health-nut you are, you do your workout... and now it's later. You are hungry and want to eat, but know that whatever you decide to cook, it's going be even later when you sit down to eat. And on top of that, whatever you make will have to be cleaned at the end. What to do???

Enter: my favorite tomato sauce recipe. In the amount of time it takes to boil water and make pasta I can make this sauce from scratch and throw together a quick and easy salad. Ta-dah! Healthy and tasty dinner, done in about 20 minutes (and the dish load is 2 pots, 1 cutting board, 1 knife, and the bowls you are eating in along with silverware).

Ingredients
  • 1-2 Tbsp of olive oil 
  • 4-6 garlic cloves, chopped 
  • 1 medium onion, chopped 
  • 4-6 ripe tomatoes, chopped 
  • 4-6 fresh basil leaves, chopped 
  • Salt and pepper to taste 
  • Pasta of your choice (follow directions on the package)

Directions                                                    
  1. Follow the directions for your chosen pasta and start the water boiling in a sauce pan, once the water is ready add the pasta, cook as directed, drain and set aside if the sauce is not ready yet 
  2. Meanwhile, in a separate sauce pan, heat the olive oil over medium-hi heat 
  3. Add the chopped onions and garlic - cook until lightly browned, stirring occasionally (about 4 minutes) 
  4. Add the chopped tomatoes, cover and let cook, stirring occasionally (about 8-10 minutes) 
  5. Add the chopped basil, salt and pepper to taste 
  6. Serve the pasta, drenched in fresh tomato sauce and enjoy! 

Options
  • Garnish with freshly grated parmesan cheese or a few more pieces of fresh basil 
  • Instead of tomatoes - consider making the sauce with yellow squash, zucchini, broccoli, spinach or any other tasty vegetable combination
  • While the sauce is simmering and the pasta is boiling chop up a quick and easy fresh salad to pair with the meal

Wednesday, August 25, 2010

Giving.

Saw a billboard while I was out running today that gave me pause...

When it comes to giving, some people stop at nothing. 

Think about it.

Monday, August 23, 2010

Art. Lost between Food and Flora.

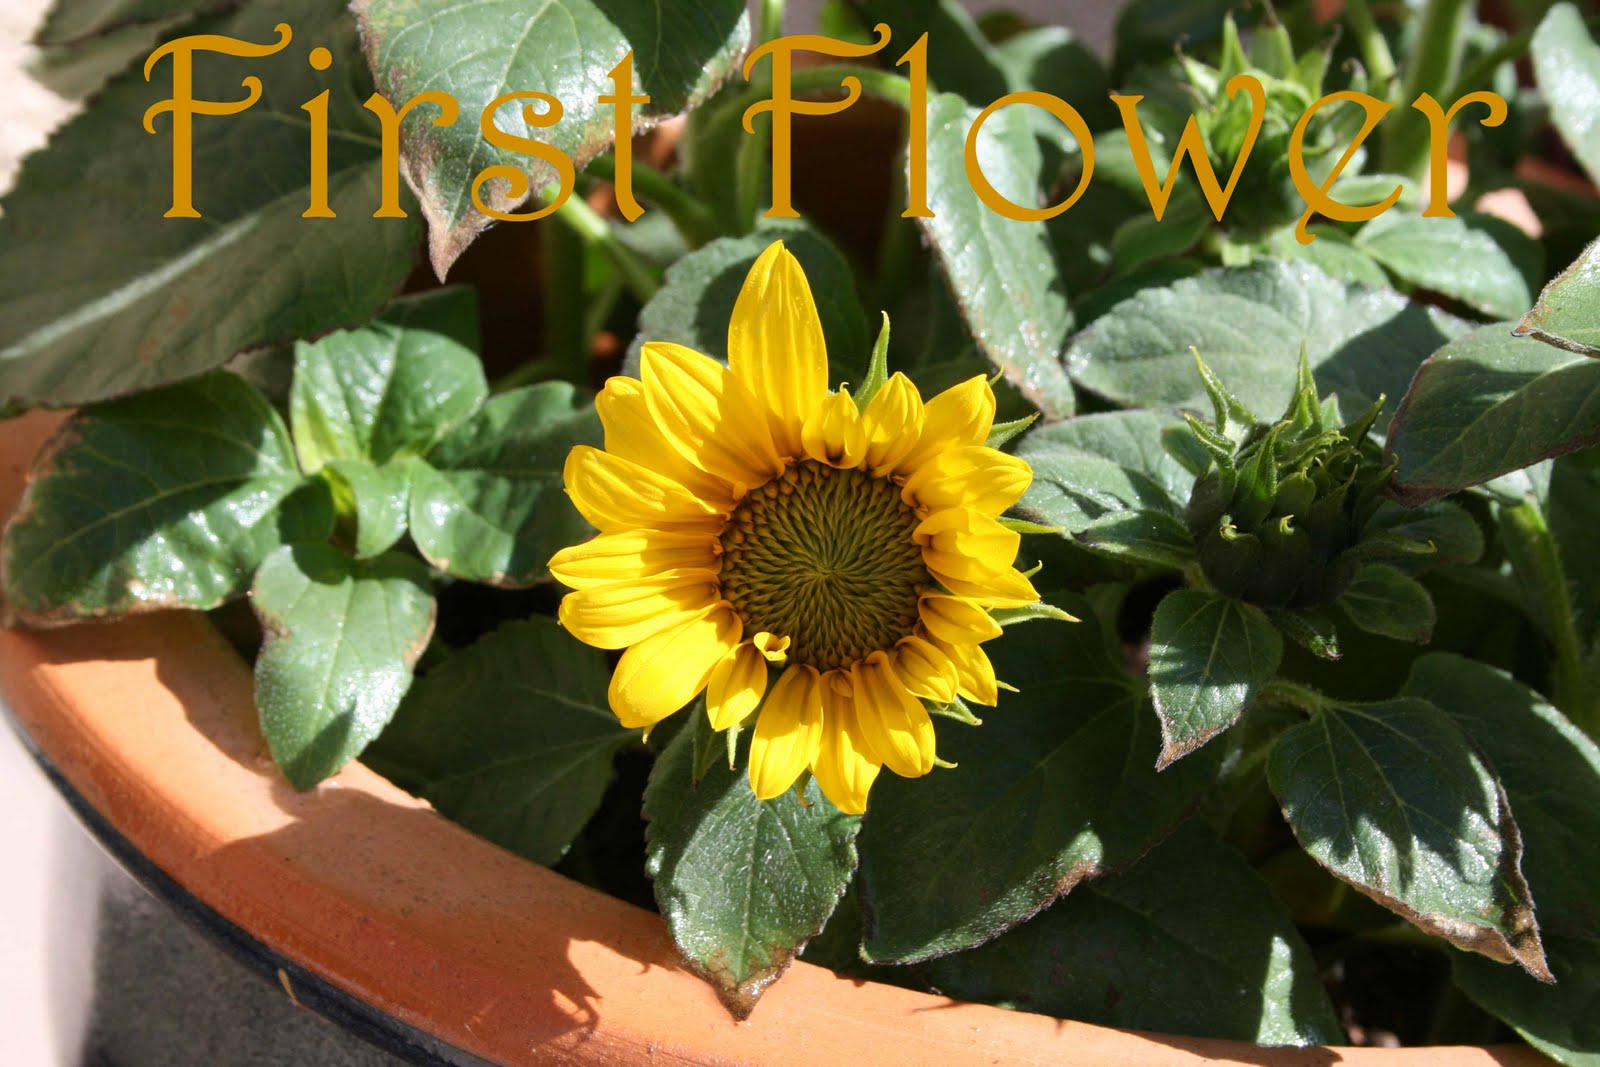
I look back over the last few months and note there have not been too many postings about Art; I have been much more focused on Food and Flora. I have decided it is time to change that trend.

Some would say that the fields of gardening and cooking, and their subsequent explorations, are art in their own right, and I would not argue with this statement. Growing and tending plants is not just about soil, sun and water; there is definitely an art to their cultivation. Cooking is similar to starting with a blank canvas, but instead of paints, I start with garlic, onions, olive oil, then combine them together, hoping to make something artfully delicious. 

The word 'art' has many definitions; I found sixteen in the dictionary. I happened to like the sixteenth best. It defined art as "science, learning and scholarship." That of course got me thinking about what do each of those words mean and what does that mean for a definition of 'art'?

  • Science is a "knowledge of the physical or material world gained through observation and experimentation." (second definition out of seven)
  • Learning is "to acquire knowledge, mastery or understanding by study or experience." (first definition out of three)
  • And finally, scholarship is "learning or knowledge acquired by study." (first definition of four)

So what does all this mean?

Based on the definition of art being science, learning and scholarship I see the following results:
  • Art is about knowledge
  • Art involves observation and experimentation
  • Art is about understanding a subject through experience (possibly observation or experimentation) 
  • Art is about learning

I think the last part is the most important, ART IS ABOUT LEARNING.

Art is not just about the artist learning about the subject matter and mastering it. It is also about the artist helping others learn about their subject. It is about sharing knowledge and a unique point of view, based on observations and experiments.

If art is about knowledge and learning, and the learning is not just for the artist, but the audience as well, I think then, there are two additional statements that help shape my definition of art:
  • Art is about teaching
  • Art can change the world through the sharing of knowledge
Everyone practices art, whether painting or writing or acting or singing or cooking or gardening or sewing or crafting or speaking or something else entirely. The art that you practice is a way for you to interact with the world and share your mastery and your point of view.

How does your art change the world?


Definitions from Websters Dictionary.

Wednesday, August 18, 2010

Succulents can bloom!

I had no idea the succulents I recently planted (and a few not so recently) could flower! Apparently they are quite content in their new surroundings. I am seeing a plethora of new growth, flowers and (I swear) smiling plants. Alright, maybe it's just me smiling because I finally have low maintenance, happy growing plants.

Check out the happy new growth!

Space Rocks is one of two plants that survived last year's foray into the world of gardening. It limped through last year, then found itself in a new pot, in a new spot and voila.... it gets flowers! It is still one of the strangest looking plants I have ever seen... I don't think the new flowers do anything to change this opinion.

Look at this plant... how can you NOT think it's smiling??? I love happy plants!

More flowers.

Thanks and happy gardening!!

Saturday, August 14, 2010

Being Lucky (in memoriam)

You were surrounded by love,
buoyed by friendship,
cared for and about.

So many people came to visit,
to sit and hold your hand,
to eat with you and watch you sleep.

They poured their love into and around you,
and you survived,
beyond all of the odds.

You lived longer
then anyone predicted,
but not as long as you wanted.

Life is rarely as long as we want.

At the very, very end,
you said you were Lucky.
You knew you were so very loved.

And with that,
you finally, quietly, inconspicuosly,
let go.

Saturday, August 7, 2010

The Garden went native.

The seeds were planted in mid spring. The seedlings came up. They grew. I watered them everyday (sometimes twice on really hot days). We were gone for 4 days and I had to find a friend to come to the apartment to water the plants. The seedlings grew into flowers and herbs and edible things. They flourished and lived. And now they have died.

Instead of replanting seeds and running "the race" again, I have decided to go native. That means succulents, drought-resistant plants, species that only need watering once or twice a week, and things that LOVE the sun. I spent a little time at Armstrong Gardening in Santa Monica this week. The staff were friendly, helpful and provided me with more information then I have received in every visit combined that I made to Home Depot or Osh over the last 4 years. (Armstrong did not pay me for this or give me any sort of kickback and does not even know I am writing about them... I just wanted to share that they were GREAT!)

That being said, I would like to introduce you to some of the new additions. I am excited to see how they take to their new environment. As usual, it will be a fun experiment to see what thrives and what dives. I am going to have to return to Armstrong soon; I have already forgotten the names of some of our new plant pals.


Hens and Chicks is also called Sempervivum arachnoideum. Apparently, under the optimal conditions, it has very rare, bright red blooms. Maybe I will get lucky!


SharkSkin Agave is a bit dangerous, but cool looking. There are sharp little spines along the edges of the leaves. I do not think I will be getting too close and personal with this little guy.

Wednesday, August 4, 2010

Wilted Greens

It seems like the only way I ever eat greens is in a salad.... not anymore! This is a great, easy recipe for preparing greens that is NOT a salad, and would be a fine accompaniment to many main courses! I found this in "Easy British Cooking", edited by Celine Hughes.

This recipe will work with any fresh, small-leaf green. I used aragula (which I just found out is also called rocket), but you could easily substitute baby greens or baby spinach. Enjoy!


Ingredients 
  • 1 or 2 large bunches of fresh small-leaf greens 
  • 1-2 Tbs extra virgin olive oil 
  • 1 lemon 
  • 1 garlic clove, peeled 
  • freshly ground sea salt & black pepper, to taste 

Directions 
  1. Crush the garlic clove while keeping it whole, and spear it on the end of a fork. 
  2. Heat the olive oil in a large frying pan over med-high heat. 
  3. Add a large handful of greens to the pan - stir them around with the garlic-fork spear until just wilted (approx. 30-45 seconds). 
  4. Transfer the greens from the pan to a plate with tongs. 
  5. Repeat steps 3 & 4 until you have all the greens you want wilted. 
  6. Squeeze a little fresh lemon juice on each pile to season, add a little salt and pepper to taste. 
  7. Eat while warm! 

Serves: as many as you want, it depends on how many greens you have

Time: 10 minutes (to gather ingredients, cook and serve)

Sunday, August 1, 2010

Cottage Pie

For me, this recipe is absolute comfort food. Potatoes, ground meat, bacon... mmmm. Sorry vegetarians, this one is not for you (but if you wanted to make the jump back to carnivore-land, this might be a good recipe to try!).  Even though it is summer right now, I can already visualize making this on a cold, rainy day, then curling up on the couch with a nice glass of red wine and a big bowl of hot-from-the-oven cottage pie. Have I mentioned "mmmm" yet?

The original recipe comes from a great cookbook a friend brought back from London, called "Easy British Cooking", edited by Celine Hughes. I made quite a few adaptations, while trying to keep the nature of cottage pie intact. I will list those changes at the bottom of this for you to peruse and perhaps try.

All I really have to say about this recipe is: Happy Cooking! Happy Baking! Happy Eating!


Ingredients
  • 2 Tbs olive oil 
  • 1 large onion, chopped 
  • 2 garlic cloves, chopped 
  • 1.5#  ground turkey 
  • 3 pieces of bacon, chopped into pieces 
  • 1/4 cup dry white wine 
  • 1 heaping tsp dry parsley 
  • 1/2 tsp dry thyme 
  • 2 Tbs tomato paste 
  • coarsely ground sea salt & black pepper (to taste)

  • 2 large potatoes, peeled & chopped 
  • 1 bay leaf 
  • 1/4 cup milk (I used rice milk, any low fat milk should work) 
  • 3 Tbs butter (I used butter substitute) 

Directions 
  1. Preheat the oven to 400 F. 
  2. Start by making the mashed potatoes - bring water, bay leaf and chopped potatoes to a boil in a sauce pan. Cook until tender, then drain and remove the bay leaf. 
  3. Place the cooked potatoes in a large bowl, coarsely mash by hand. Add in the butter, then milk; mix until your desired consistency is reached. (For creamier mashed potatoes use an electric hand blender/whisk.)
  4. While the potatoes are boiling - heat the olive oil over medium heat in a frying pain. Add the onions and cook until browned (3-5 minutes). 
  5. Add the garlic, ground turkey and bacon - cook until the meat is almost completely browned. 
  6. Add the wine to the frying pan - cook until evaporated (adjust the heat as needed). 
  7. Stir in the parsley, thyme, tomato paste, salt & pepper.
  8. In a medium-sized casserole dish spread the meat mixture over the bottom and level with a spoon. Cover the meat mixture with the mashed potatoes. 
  9. Bake until the potatoes are golden brown on top, about 25-30 minutes. 

Serves: 4 large portions

Cook time: About 1 hour and 30 minutes (includes all the prep time, boiling potatoes, and baking the casserole in the oven) 

Adaptations 
  • Olive oil - original recipe called for 2 Tbs butter to brown the onions and meat 
  • Ground turkey - original recipe called for ground beef 
  • Bacon - original recipe called for 5-6 pieces of bacon 
  • Cheddar cheese - original recipe called for 1/2 cup of cheddar cheese to be sprinkled over the casserole before it went into the oven - I omitted this altogether 
  • Milk - original recipe called for whole milk in the mashed potatoes 

Tuesday, July 27, 2010

Garden Harvest

Just in case the picture does not speak for itself.... here is the carrot harvest from the garden!

Saturday, July 24, 2010

Fig & Prosciutto Salad

Fig & Prosciutto Salad


Figs are in season right now; I am finding them everywhere from the Farmer's Markets to grocery stores to hanging on trees along the streets. I think they are a food that people either love or hate and I think a lot of it has to do with texture. I am not a huge fan of the fig, all on it's own; however, I LOVE them in this salad. The mix of sweet figs with salty prosciutto and tangy vinegar dressing on fresh, earthy field greens is divine.

The recipe is adopted from Alfred Portale's "Simple Pleasures" cookbook. It is one of the easiest summer meals I have thrown together and stands on it's own for a light dinner, especially if you pair it with a nice piece of bread and a fine glass of white wine.


Ingredients
 Dressing
  • 2 Tbs + 1 1/2 tsp of balsamic vinegar 
  • sea salt to taste
  • freshly ground black pepper to taste 
  • 1 Tbs honey

Salad
  • 1 Tbs extra virgin olive oil 
  • 4 oz prosciutto - thinly sliced strips 
  • 8-10 figs, stems removed, sliced into halves or quarters (depending on size of the figs) 
  • 2 oz feta crumbled (I used sheep's milk) 
  • 4 cups arugula, rinsed and tossed (or other rich field greens) 

Directions
  1. Mix the dressing - place the vinegar in a small bowl, add the salt and pepper, stir. Then mix in the honey. Set the dressing aside. 
  2. Place the arugula (or other field greens) in a large prep bowl - drizzle with olive oil and mix well. 
  3. Divide the greens evenly into serving bowls. Add the figs and prosciutto. Drizzle the dressing on each salad. Sprinkle with the cheese. 

Servings - These portions made 2 large salads or could be divided into 4 smaller plates. Enjoy!!

Tuesday, July 13, 2010

I lived my life. (in memoriam)

My friend: I did not live my life to write a book. I lived my life to live.

Me: I know that. But your life has been amazing.

My friend: Well, I didn't set out to make it amazing. I only set out to live each day.

Me: (smiles, nods "yes") I know... but that living has lead to a truly amazing life. Have you ever thought about writing it all down? Or even telling your stories and letting someone record them?

My friend: Oh goodness.  Another person wanting me to record everything. (smiles, shakes head "no")

Me: Why not?

My friend: Because my life has been my life. And your life will be your life. And why would reading or hearing my life story change yours? It should not be that way.

Me: Because you have wisdom and perspective. You have lived a full life and I am honored to learn from you.

My friend: Well, that may be so. But I'm not going to write or record anything - my life can live on through those that knew me and remember me. The rest of the world will  just have to figure it out.

Me: (smiles, nods head "yes") Then I will have to do my best to not forget you and to share what I know of you and your life.

My friend: Fine. (turns head and looks around, leans in closer) Really, it all boils down to one thing: remember to live your life to live it. Not to think about what you will look back on later, but instead to live each day. Just live.


This was a conversation I had with a patient (and friend) of mine almost weekly for six months.

She never wrote down or recorded any of her stories; however she did share them with myself, her family, and her friends. Those shared stories are where her memory lives.

It really all boils down to one thing: remember to live your life.

Friday, July 9, 2010

Asparagus the Easy Way

Roasted Asparagus

I'm not sure I have posted a recipe that is both this easy and this tasty before. The ingredient list is short. The prep time is nothing. And the roasting requires only an oven and one flipping half-way through. The result is super tasty and pairs well with so many dishes. If we had a grill, we would grill asparagus, but since we do not, this is a great way to get the same type of flavor. This recipe was adapted from "The Santa Monica Farmers' Market Cookbook," by Amelia Saltsman.

Ingredients
  • 1 bunch of asparagus - ends trimmed 
  • olive oil
  • sea salt
  • freshly ground black pepper 

Directions
  1. Place the top rack of the oven in the upper third. Preheat to 450 degrees.
  2. Lay the asparagus out on a baking sheet - allowing space between each stalk. 
  3. Generously sprinkle with olive oil, salt and pepper to taste. 
  4. Roast the asparagus for 6 minutes - use a spatula or tongs to flip - roast for another 6 minutes. 

Eat and enjoy!

Friday, June 25, 2010

Welcome to the garden!

I am welcoming two new friends to the garden!  Please make the acquaintance of Basil and Sage. I hope they choose to stick around for a while and grow happy, healthy and hearty. Cheers!

Tuesday, June 22, 2010

A few new flowers are blooming!

Over the past few weeks a few new things have started blooming.

The sweet peas are lovely, coming out in red and purple and smelling so fresh and sweet.

The cornflowers are a rich blue and they have become quite prolific; I am excited to see them all in bloom together.

Finally, the calendula has made an appearance and it is a stunning yellow. 

I am still hoping for appearances from echinacea, ruby red swiss chard and little finger carrots. I will keep you posted.

Wednesday, June 16, 2010

Spiced Banana Muffins

Spiced Banana Muffins

I have a weakness for baked goods. I love the whole process. I love gathering ingredients from the various cabinets and drawers in the kitchen. I love pulling out the mixer and feeling its solid heft as I place it on the kitchen counter. I love pouring the batter into trays or muffin cups and I especially love the smell that wafts through the apartment after only a few minutes in the oven. Once again, I wish I could digitize a smell and attach it to this blog; that delicious spicy smell of cinnamon and warm apples, roasting in the oven. Mmmm. Finally, I love eating. I love the first bite when it is still warm from the oven, but not so warm that it burns my mouth.

These muffins have been a work in progress for the last 4 years. The original recipe came from my mom, but I doubt she would recognize that recipe in here after all the changes I have made. This posting is vegan, can easily be gluten-free, and is utterly delicious.

Happy baking!!


Ingredients
  • 1 cup applesauce 
  • 2 Tbs vegetable oil 
  • 2 Tbs Ener-G egg replacer 
  • 8 Tbs water 
  • 1 1/2 cups sugar 
  • 4 large, soft bananas (6 medium-sized) 
  • 2 tsp baking soda
  • 1 tsp cinnamon
  • 3 cups gluten-free oat flour (can be regular oat flour too) 
  • 1 cup fine sorghum flour 
  • cooking spray or paper muffin cups

Directions
  1. Preheat the oven to 350 degrees. 
  2. Mix the applesauce, vegetable oil, egg replacer and water on medium until well blended
  3. Mix in the sugar and each banana one at a time until well blended
  4. Add the baking soda and cinnamon
  5. Add the flour one cup at a time - mix until all is well blended
  6. Spray each muffin tin with cooking spray or use muffin cups - fill each cup approximately 2/3 full 
  7. Bake for 45 minutes (or until the muffins are springy and slightly browned)
Yield: approximately 24 muffins
Time: approximately 60 minutes (includes baking time)

Thursday, June 3, 2010

Rooftop Garden Harvest

Apologies for the lag between posts. Below are pictures of the sunflowers, the chives, and the radish harvest to-date. Enjoy!

Wednesday, May 26, 2010

It's been exciting!!!

First, there is finally some color in the garden!


Second, I harvested my first radish!


And third, I have a new friend in the garden... a ladybug!!! This is such a good good sign!  It means things are healthy. It means the good bugs (like ladybugs) want to come hang out. I hope this one brings a few friends the next time he visits. It means the ladybugs will potentially eat and keep away any bad, predator-type bugs. Yay!!!

Wednesday, May 19, 2010

Cioppino


Cioppino

I think this may be one of the easiest meals I have ever made (and one of the most delicious). The ingredient list may seem long, but most of the items you will already have in the kitchen and nearly all the rest can be bought at a fish market. I think the trip to the fish market was one of my favorite parts of this process.

The recipe is adapted from "Cooking Light: Annual Recipes 2004" and is a recipe from Mothers Restaurant in Portland, OR. From what I read cioppino goes really really well with a fresh loaf of crusty french bread or a batch of french fries. Since Will and I cannot eat wheat, we skipped the bread and ended up pairing this with rice and a side salad. I also changed this recipe so that there is more broth than other cioppino recipes.

Ingredients
  • 2 tsp olive oil
  • 1/2 tsp crushed red pepper 
  • 3 garlic cloves, chopped
  • 1 1/2 cups clam juice 
  • 1 cup water
  • 1 Tbs dry parsley
  • 1/2 tsp dried basil
  • 1/4 tsp dried thyme
  • 1/2 of a 26 oz bottle of tomato-basil pasta sauce 
  • 10 littleneck clams 
  • 10 small mussels, scrubbed and debearded 
  • 1/2 cup dry white wine 
  • 1/2 tsp salt 
  • 1/4 tsp freshly ground black pepper 
  • 1/2 # of lean white fish (cod, halibut) - cut into 1 inch pieces 
  • 1/2 # of medium shrimp, peeled & deveined 
  • 2 cups torn spinach 

Directions
  1. Heat the oil in a large soup pot over medium-high heat. 
  2. Add the red pepper and garlic - saute for a minute. 
  3. Stir in the clam juice, water, parsley, basil, thyme & tomato sauce - heat for a couple minutes. 
  4. Add the clams & mussels - cover and cook for 10 minutes or until the shells open (Discard and do not eat any unopened shells). 
  5. Add the wine, salt, black pepper, white fish & shrimp - simmer for 5 more minutes. 
  6. Stir in the spinach - cook for one more minute. 
  7. Serve and enjoy!!!

Friday, May 14, 2010

A Labor of Love for Soup

Brazilian Chicken Soup with Rice

I love this soup, but will start off by saying the making of it is not for everyone. The eating of it is for everyone (who eats chicken and veggies and rice), but the making is something altogether different. This is what I would call a "weekend meal" - the kind of meal you take your time preparing and do not have to throw together in 30 minutes or less.

This soup is a delicious cooking experience that is a labor of love. It is adapted from "The South American Cook" by Maria Baez Kijac. If I could attach a smell to a blog I would bottle the smell of this soup as it simmers on the stove and send it to each of you - it makes my mouth water to think about it! It reminds me of rainy winter days in the northwest and wrapping up in soft blankets on the couch and watching a great old movie (while the whole time this soup is simmering in the background).

At the bottom of this post I have written my adaptations to the recipe list and the prep work that would make this a weekday meal (i.e. much quicker and simpler to prepare). Enjoy!

Ingredients
  • 2 Tbs canola oil 
  • 3-4# whole chicken - cut into large sections, rinsed, patted dry 
  • 1 large onion - chopped 
  • 4 garlic cloves - coarsely chopped 
  • 4 small tomatoes - chopped 
  • 2 large carrots - sliced 
  • 2 leeks - chopped (white and green parts) 
  • 2 tsp salt 
  • freshly ground black pepper - to taste 
  • 8-10 cups water (enough to cover all the chicken)
  • 1 cup long grain rice (I had Jasmine in the cupboard, it worked well) 
  • 1/2 bunch fresh cilantro - coarsely chopped

Directions
  1. In a large soup pot heat the oil over med-high heat - add the chicken pieces a few at a time - rotate until all the pieces are browned a bit on all sides 
  2. Add the onion and garlic - cook for 3 minutes over medium heat 
  3. Add the water, tomatoes, carrots, leeks, salt and pepper - bring to a boil
  4. Skim off the froth on the surface - reduce to a simmer, partially cover and simmer for 1 hour 
  5. Transfer the chicken to a bowl (using tongs or a slotted spoon)
  6. Pour the veggies and broth through a strainer into another large soup pot - reserve the veggies 
  7. Heat the broth to a boil - add the rice - simmer for approximately 30 minutes (or until the rice is soft) 
  8. In the meantime, pick all the meat off the chicken - discard the skin and bones
  9. Add the veggies and chicken back into the broth/rice mixture - simmer 5 minutes 
  10. Add the chopped cilantro and serve

Possible Time Savers
  • Chicken - buy one that is already cut into pieces (saves on prep time)
  • Chicken - buy one that is already roasted - place the whole chicken in the pot - only simmer for 30 minutes instead of 1 hour 
  • Tomatoes - use 1 can of drained, chopped tomatoes 
  • Garlic, onion and carrots - can all be bought in some stores already chopped
  • Rice - use quick-cook rice (will only need to simmer the broth until the rice is done, then immediately add in the chicken meat and veggies)

Wednesday, May 12, 2010

Chincherinchee

Did the title grab your attention? Are you wondering, what is "Chincherinchee"?

Lucky for you, I am not going to make you wait (at all) - it is a plant!  A super cool, never-seen-anything-like-it-before plant (that a wonderful friend gave me for my birthday). Here is a picture of it.


The plant is a native to South Africa, where it is spelled: tjenkenrientjee (which became chincherinchee in English). It's scientific name is ornithogalum thyrsoides. It has also been called Wonder Flower and Star of Bethlehem, and on the label that came with my personal plant, it is called White Star. It likes sunlight, moist soil and does well both in and outdoors.

Here are a few more pictures of this marvelously cool plant that is supposed to bloom for up to 3 months!
Enjoy!!


This is the link to the website where I finally found the official name of this totally cool plant: 
http://www.microscopy-uk.org.uk/mag/indexmag.html?http://www.microscopy-uk.org.uk/mag/artfeb06/bj-ornitho.html

Wednesday, May 5, 2010

Thank you Mr Dolphin

Dear Mr. Dolphin,

Thank you for sharing my run along the beach today. I really wanted to stop and walk but everytime I glanced out to my right, across the waves, there you were!

You were the perfect "running" companion; you cruised along at my pace, did not critique my running form, and did not criticize my choice in music. You also stayed by my side for the whole mile (I think the lifeguards who were tracking your progress got a little jealous).

Thank you!
Rachel

Sunday, May 2, 2010

Cartagena-style Rice

Cartagena-style Rice

A tasty and easy side dish.
Direct from "The South American Table" by Maria Baez Kijac.
As long as you do not have any issues/dislikes of coconut I see no reason to skip this recipe.
Soooo good.

Ingredients
  • 2 cups of long grain rice (I used jasmine)
  • 1 can coconut milk, unsweetened, 14oz
  • 1 1/2 cups of water 
  • 1 Tbs sugar 
  • 1 tsp salt 

Directions
  1. Combine all the ingredients in a heavy sauce pan.
  2. Bring to a boil - reduce heat to a low simmer - cover and cook until the rice is done (15-35 minutes, depending on the type of rice you choose to use)
  3. Once the rice is soft, remove from heat, fluff with a fork - serve and eat warm!

Yum.

Green. Green. Green.

Everything in the garden is green. Green leaves. Green stems. More green leaves. Green.

I am ready for some color. There is a hint of red at the base of the radishes, but otherwise, everything is green. Please don't misunderstand me, I am thrilled that things are growing; I am just ready for blooming, in addition to the growing.

I am also ready for the blooming, so that I can officially figure out what is what. I planted a number of pots with a mix of flower seeds and now I have no idea which are which... so, I need things to bloom to figure out what is doing well (and might be planted again next year) and what is not doing well (and will not be welcome back for a second visit).

Below are a few pictures of the greenery... radishes, carrots, baking (in the sun) sunflowers, and a mix of flowers. Enjoy!!!